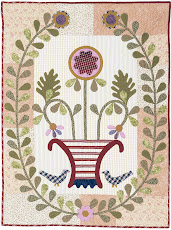
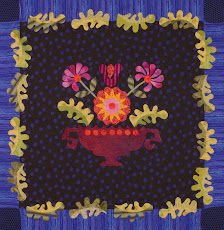
At least one person commented on all the berries in Abiding Joy, leading me to my next subject — how much I love berries!
To me, a quilt can never have enough berries. Not only do I love the visual interest they add to a design, I also love making them.
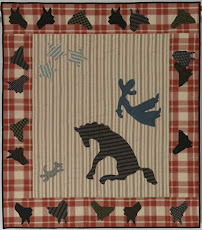
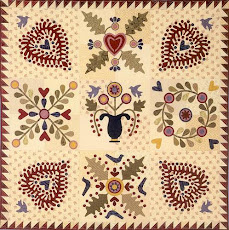
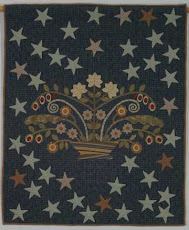
That wasn't always the case. My first attempt at berry-making was in the late 1990s, when the members of the Kaw Valley Quilter's Guild in Lawrence, Kansas, were making Floral Bouquet* for a fund-raising project. To create the 300-400 berries for this quilt, the project designers and chief appliqué artists, Shirley and Shirlene Wedd, asked volunteers to make small yo-yos from nickel-sized fabric circles. I agreed to make about 20 yo-yos. Aack! I had never worked with circles that small, and I was horrified by the misshapen lumps I created. I tried remaking some but with no better results, so finally I just turned them in "as is." After the quilt top was finished, I asked Shirley if she had been able to use all the yo-yos that the volunteers had made. I thought she'd say "All but 20." But instead she just laughed and said that she and the other appliquérs had been able to smooth out all the edges as they hand-stitched them to the background fabric. I was so impressed!

Now that I've learned to machine appliqué, I can make nearly perfect berries by using paper circles as the basis for each berry. When the berries are a standard office-dot size — 1/2", 3/4" or 1" — I use white removable office dots. For berries of other sizes, I use a circle template to draw the berries onto freezer paper. I stick or iron the paper dot or circle onto the back of my fabric and cut the fabric out with a scant 1/4" seam allowance. Then I apply a white glue stick to the back of the circle and use the sharp point of my Clover seam ripper to fold and gather the seam allowance to the back of the dot. With the sharp point of the seam ripper, I am able to make tiny tucks as I gather the seam allowance, creating a really smooth edge to the circle. The paper backing holds the edge in place as I stitch around it, and it's easy to remove the paper later. Now I think I can make any quilt design I want, no matter how many berries!

When I am lucky enough to attend my old quilt group meetings in Kansas (I now live in Kentucky), my friend Barbara brings me a plastic baggie of white office dots and some fabric scraps so I can make berries while I talk to my friends. (If only I were organized enough to bring my own projects to work on, but usually just getting to Kansas has used up all my organizational skills. Oh well, a subject for a different blog.) Making berries is one of the perfect quilt group activities — the rhythm of making the circles is relaxing, and it leaves my mind free to concentrate on friends and conversation. I leave the bag and the stitch-ready circles with Barbara, with full expectation of seeing all my beautiful dots on one of her quilts some day.
*When Barbara and I published Floral Bouquet as a 4-part block-of-the-month series in 1999, we changed the original berry pattern to 3/4" finished berries. The originals were a little smaller, about 5/8" depending on the individual yo-yo maker's stitching.
The original quilt was very popular. Elly Sienkiewicz included a picture of it in her book The Best of the Baltimore Beauties, and a beautiful version made by Karen Lipp of Rapid City, SD, was in the 2008 Quilt Art Engagement Calendar. We still have a few patterns left; if you're interested write me at kcmenaugh@sunflower.com.


Thanks for sharing your technique. I never thought about the removable dots, how clever. The thought of drawing out hundreds of 3/4 " dots .....well, removable dots, Perfect!
ReplyDeleteWhat a great blog, just found your blog and love what I've seen. I'm a great admirer of folk inspired art and quilts and usually steer that way myself, mixing with traditions. Thank you for sharing!
ReplyDeleteEsther