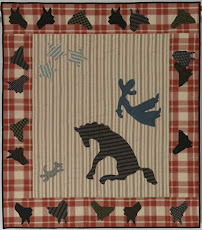
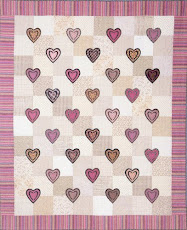
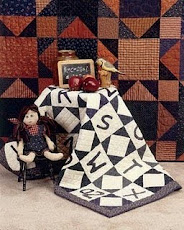
Here's another set of quilts where we gained new appliqué shapes when we cut the background out from behind the appliqué in our first quilt. When we made Heart to Heart, we appliqued the reverse appliqué detail onto the plain hearts, then stitched the heart shape onto the intersections of background squares. When we removed the freezer paper and background fabric, we had these cute little four-patch hearts left over. We made Heart Neuveau, a doll quilt, with some of the leftovers.


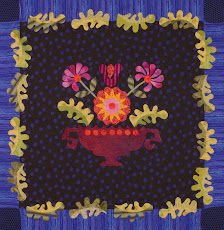
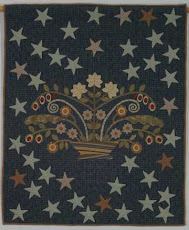
After last week's post about the "bonus stars" I found when I removed the background and freezer paper from Cactus and Cottonwood, I realized that perhaps I should explain about removing the freezer paper from your machine-appliquéd project.
When I teach classes, most of my students tell me that this is the step they dread the most. I think that many of us started to learn appliqué when the general wisdom was to leave all the background fabric intact behind appliqué shapes in order to help stabilize the quilt top. But, if you think about it, leaving a 1/4" seam around an appliqué shape isn't a lot different from leaving 1/4" seams around pieced blocks, so I think it's OK to cut the background out from behind each appliqué shape. If you are hand quilting your project, having only one layer to quilt through instead of 2 or 3 will be a bonus, as well.
I love leaving the freezer paper in the project while I'm sewing because the paper holds the edges of each piece in place. Even if I wiggle around a bit while I'm sewing, the edge of the shape stays as perfect as I have prepared it.
Removing the freezer paper is easier than you would think. Here's the technique that works for me:
1. First of all, I wash all my fabrics in hot water and dry them in the dryer before I use them. This pre-shrinks the fabric and removes the sizing, making the fabric softer and easier to work with.
2. I try to make my block backgrounds over-sized whenever possible.
3. After I've finished all the stitching, I wash my block in cold water and a gentle, short cycle in the washing machine and dry it in the dryer.
4. When I take it out of the dryer, I DON’T iron it. The water has washed away most of the glue and released the freezer paper, but the freezer paper still has a little bit of “stick” left that would adhere to the block again if I ironed it.
5. I wait until this stage to cut away the background fabric behind the applique pieces. This way, none of seams ravel as they are going through the washing machine and dryer. I cut around each shape, leaving a 1/4" seam allowance.


Karla, I see your class descriptions are not posted yet. Do you do lectures and trunk shows?
ReplyDeleteCouldn't find an email address for you, would you please email me at dawne86@hotmail.com. I would like to discuss a speaking engagement with my guild.Thanks.
Dawn, Thanks for asking about my classes! I am working on a new class schedule and will have it posted as soon as I finalize the details. In the meantime, feel free to write to me at kcmenaugh@sunflower.com.
ReplyDelete