Tuesday, February 23, 2010

Clipping inner curves

After my last post, Lorraine wrote "I would like to see a post with how you cut the inside curve BEFORE it is glued down. I can't picture it."

Well, Lorraine, you were right to call me on that! I thought about showing that part of the process when I wrote the last post, but it's impossible to show the clipping in a photograph. And my illustration skills are nil!

How you clip an inner curve is important, though, because you need to make the fewest cuts possible. So I made up a couple of little illustrations in Photoshop Elements. As you can see, I'm not lying about my drawing skills! But I hope this helps. Please feel free to write in with more questions.

If you compare the two illustrations at left showing how to make a Y-shaped cut in the seam allowance of a narrow curve to the photo at right showing the seam allowance after it's turned under, you can see that the top of the clipped "Y" turns into a vee-shape when the seam allowance is folded and glued to the back of the fabric. 


If you are working with a wider curve, then you can dispense with making that first clip into the center of the curve and just make 2 angled cuts into the corners of the curve:


When you're making the clips into the corners of the curve, stop clipping just a thread or 2 from the freezer paper. While you're turning under the seam allowance, watch for little threads at those clipped points, and be sure to fold and glue all stray threads to the back of the freezer paper. You should sew extra stitches at the clipped curves.

I hope this helps! Thanks for asking questions!

Karla

Sunday, February 14, 2010

Feathers and Hearts for Valentine's Day


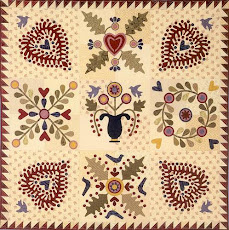
In honor of Valentine's Day, here's a picture of one of my favorite heart quilts. One thing I loved about learning to machine appliqué was that I could make any design I wanted. Making Fat-Quarter Folk Dance gave me a chance to indulge my love for those beautiful, fussy feathered hearts found in many antique quilts.

These hearts still took some time, even with machine appliqué. I had to take care in cutting all those curves, first in freezer paper, then in fabric. Then there's gluing all the edges in place and stitching around each curve. But I think it was worth it!

This quilt offered some challenges in preparing and stitching all those inside curves. Here are a few of my tips:

To make working with inside curves a little easier, I usually change the sharp inside corners of the original designs to rounded inside curves. As you can see on these hearts, all the inside curves are rounded scoops rather than sharp points.

If the space inside the curve is small, I have to use smaller-than-usual seam allowances in tight spots.

The inside curves will be more stable if you make a “Y”-shaped clip at each inside corner. To do this, start at the center of the curve. Clip straight in, just a few threads deep. Then make two cuts, each angled toward a "corner" of the curve. This will relieve the strain on the inside curve with the least number of cuts in the fabric.

When you've turned the edge under, the back of the curve will have a vee-shaped piece of fabric covering the center curve and just a thread or two of seam allowance at the clipped points. Put plenty of glue in those spots and use the tip of your finger to firmly roll those threads over to the back of the freezer paper. Be sure to glue under even the smallest threads that may be turned to the back of the piece.

To further stabilize the curve, sew extra stitches at each inside point, especially where you have made the clips in the seam allowance.

Saturday, February 6, 2010

Removing the freezer paper


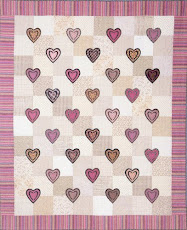
Here's another set of quilts where we gained new appliqué shapes when we cut the background out from behind the appliqué in our first quilt. When we made Heart to Heart, we appliqued the reverse appliqué detail onto the plain hearts, then stitched the heart shape onto the intersections of background squares. When we removed the freezer paper and background fabric, we had these cute little four-patch hearts left over. We made Heart Neuveau, a doll quilt, with some of the leftovers.


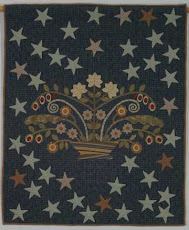
After last week's post about the "bonus stars" I found when I removed the background and freezer paper from Cactus and Cottonwood, I realized that perhaps I should explain about removing the freezer paper from your machine-appliquéd project.

When I teach classes, most of my students tell me that this is the step they dread the most. I think that many of us started to learn appliqué when the general wisdom was to leave all the background fabric intact behind appliqué shapes in order to help stabilize the quilt top. But, if you think about it, leaving a 1/4" seam around an appliqué shape isn't a lot different from leaving 1/4" seams around pieced blocks, so I think it's OK to cut the background out from behind each appliqué shape. If you are hand quilting your project, having only one layer to quilt through instead of 2 or 3 will be a bonus, as well.

I love leaving the freezer paper in the project while I'm sewing because the paper holds the edges of each piece in place. Even if I wiggle around a bit while I'm sewing, the edge of the shape stays as perfect as I have prepared it.

Removing the freezer paper is easier than you would think.  Here's the technique that works for me:

1. First of all, I wash all my fabrics in hot water and dry them in the dryer before I use them. This pre-shrinks the fabric and removes the sizing, making the fabric softer and easier to work with.

2. I try to make my block backgrounds over-sized whenever possible.

3. After I've finished all the stitching, I wash my block in cold water and a gentle, short cycle in the washing machine and dry it in the dryer.

4. When I take it out of the dryer, I DON’T iron it. The water has washed away most of the glue and released the freezer paper, but the freezer paper still has a little bit of “stick” left that would adhere to the block again if I ironed it.

5. I wait until this stage to cut away the background fabric behind the applique pieces. This way, none of seams ravel as they are going through the washing machine and dryer. I cut around each shape, leaving a 1/4" seam allowance.

6. After the background fabric is cut away, I gently tug on the bias around each applique shape. The paper usually just pops right out. Occasionally, I have to use tweezers to pull away any remaining paper that likes to stay in corners or tight spots.